I’ve been covering the house in Halloween decorations since September 1st — skeletons, severed hands, pumpkins, dancing Frankensteins, I CAN’T STOP MYSELF.

I just love Halloween.
But of course the problem with putting up your Halloween decorations two months ahead of time is that it gets old before the day arrives. Then what’s special suddenly becomes boring, which is no fun at all for what I consider to be the best time of the whole year!
So I like to keep things fresh by changing out a few of my decorations during the lead up to October 31st.
After all, I have TWO enormous storage boxes of Halloween decorations (once necessary for our four bedroom house, not quiet as necessary for our two bedroom townhouse) so rather than drown the house in a Halloween tidal wave I like to mix things up so we get to see all our Halloween favorites across a two month time span.
My favorite thing to change out weekly is our dining table centerpiece since we see it every night at our family meal.
So I put together 13 variations of a Halloween centerpiece, all using the same glass vase (a big, beautiful brandy snifter which you can easily find at your nearest Hobby Lobby or they have some nice ones on etsy). Nothing I did left any permanent marks on the vase so I can keep re-using it and everything was inexpensive or something I had laying around the house.
Enjoy and feel free to implement these in your house for the Halloween holiday season!

1. PUMPKINPALOOZA
As previously mentioned, I have a boatload of Halloween decorations including five strings (FIVE STRINGS!) of different Halloween lights. I took the two strands of pumpkin lights I didn’t feel like hanging, popped the plastic pumpkins off and added them to my vase with a candle in a glass cylinder (both from Dollar Tree) in the center. SO EASY!

2. CASPER THE FRIENDLY VASE
The white spider web material (available at the Dollar Tree) has many great uses, in this case I put a flickering, battery operated candle in the center of the vase (sorry you can’t see it here) and filled the rest of the vase with the spider web stuff, then used a dry erase marker to draw ghost eyes and mouth on the glass. In the dark, this flickering ghost light was a huge hit!
You could also fill the vase with green tinted water or green saran wrap (do they still make colored saran wrap?) and add a witch or Frankenstein face with your dry erase markers.

4. ON TOP OF OLD SKULL-Y
Best thing about this snifter vase is that turning it over yields the perfect pedestal for a great presentation! Here I flipped the vase on “scary cloth” from Dollar Tree (black netting, one of my favorite universal decorating pieces) added a skull (also from Dollar Tree) and glitter skeleton (Dollar Tree again) plus my battery operated flickering candle (Wal-Mart). The result is a taller, more sinister centerpiece (and shouldn’t all centerpieces dare to be so sinister?)

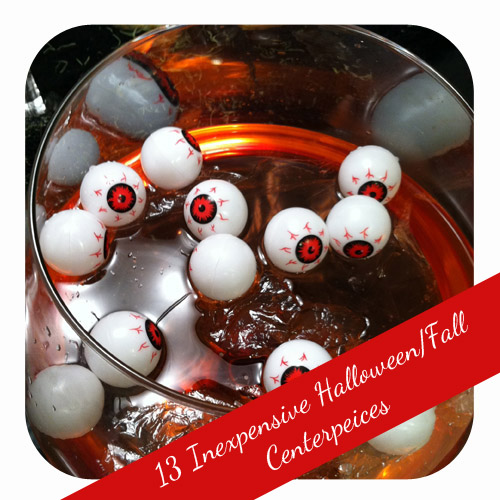
3. THE EYES HAVE IT
EW! I had to include a few scary/gross combinations as well (it wouldn’t be Halloween otherwise, duh!). This one was super easy and cheap. I filled the vase with water, added red food coloring, added some clear saran wrap (in water it takes on a bizarre, creepy texture) and threw in a pack of plastic eyeballs I picked up at (where else) the Dollar Tree! This could be great for a Halloween party punch as well (minus the saran wrap, of course).

5. GLOWING SPIDERS
I thought outside the vase on this one (see what I did there?) by covering the outside of the vase in my spider web material and a few scary spiders as well. Inside the vase I used my scary cloth as a base and added my flickering battery operated candle for a nice (but safe) glow. I did have to use a few strategic pieces of scotch tape to a fix the spider web to the glass but the web itself obscured those from sight.

6. GIANT HALLOWEEN SNOWGLOBE
I also have a lovely Halloween village (details coming soon) but before I set it up this year I used one of the smaller houses (picked up at CVS for $2.50) to create this centerpiece. I taped from spider webbing to the top (bottom?) of the vase so it would swirl around the house like a cloud. Because the pedestal base isn’t huge, I added a glass plate so I would have room for this three candle set (I used the battery operated ones again but in this case you could use regular flame candles).

7. GIVE ME A HAND, WILL YA?
Everything in this vase came from Dollar Tree! The severed hand (my new favorite Halloween decoration, it’s currently holding the soap in my bathroom!) the bloody gel window clings and the eyeballs were all a dollar each. This creepy centerpiece would also look good if you suspended the hand in water (you’d have to anchor it to the bottom somehow though, I think it would float) or if you put an apple or some other food item in the hand.

8. CEMETERIES AND CHOCOLATE
Mmm this is one of my favorites (and not just because those brownies were delicious). Two tombstones from Dollar Tree + Scary Cloth + dessert plate = a Halloween centerpiece that doubles as your dessert display! Better yet, you get to watch the kids fumble through their meal trying to clean their plates so they can dig into that delicious dessert. You could also use this one to display any other finger foods at a Halloween party. Fun!

9. COLOR-FALL
I had to do one centerpiece that was just for fall, not necessarily Halloween. For this I used an assortment of pumpkins & gourds, leaves, tiny pine cones and cinnamon sticks — all from the Dollar Tree (do you see the pattern yet?). You MUST put the vase in the center first with the candle and arrange the decor items around it. With the narrow opening at the top of the vase this can be tricky, but I was able to get everything in mostly turned in the right direction (with these types of centerpieces you have to learn to NOT be a perfectionist…very difficult to do, I know).

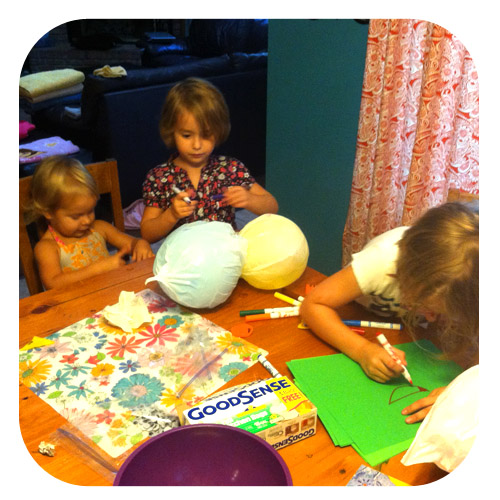
10. CLINGY KID FUN
The kids can help with this one! Window clings from Dollar Tree plus my battery operated candle made for a fun, kid-friendly centerpiece. They have all different kinds of window clings, which of course are totally reusable so the kids could re-arrange them every night or change them out for different ones! Might be a good pre-dinner activity to get them to the table before the meal is ready.

11. DEXTER’S DELIGHT
Ah, the dreaded bloody candle! Again using my blood splatter window clings (a favorite decoration, also good for refrigerators china cabinets and mirrors) I made a Dexter-esque bloody massacre scene. I used regular salt for the base, but you could use epsom salt or sugar just to give it a textured white surface. Then I took my gel food coloring and went nuts splattering the inside of the face with pretty realistic looking blood. I even put some on my hands and made blood finger prints on the candle. All of this washed off when I was done (though I’m not sure it would if you actually lit the candle, but this was an inexpensive Wal-Mart number so I didn’t care if it was stained).

12. AU NATURALE
For a more natural, fall/creepy centerpiece, look no further than your backyard. Everything in this centerpiece (other than the vase and the place mat) came from my yard. In one walk with the dog, I scooped up a bucketful of nature’s best fall decorations (well, at least the kind Florida has to offer) and arranged them in my vase for a tall treat. Even without the sticks and leaves, just the pine cones and moss were a cool, all natural focal point (just make sure you shake your pine cones out, one of mine had a bug in it– NOT COOL!)

13. FLOATING CANDLE FAIL
This is my work in progress and a bit of a Pinterest fail. I can’t even find the original pin, but you’re supposed to be able to submerge a candle in a glass vase into a larger vase filled with water, so from the outside it looks like the candle is under water. The inherent problem with this is that the candle w/small vase wants to float. In this case I had to fill half the small vase with rocks to keep it down which kind of took away from the overall appeal. I think when I try it again (which I will, because I’m determined to make it work) that I’ll get some ball bearings or washers, something heavy and small so I don’t have to fill half the vase to keep it down.